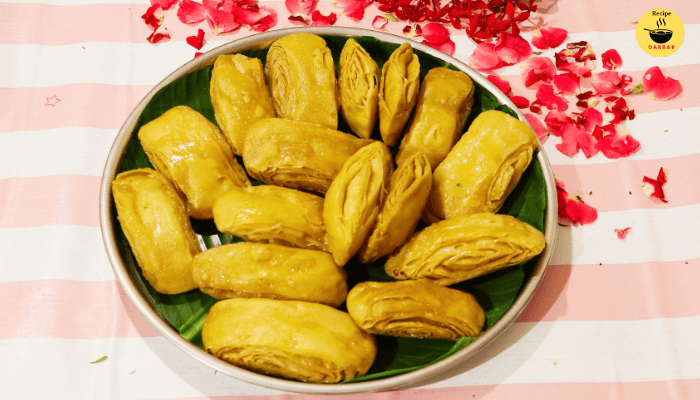
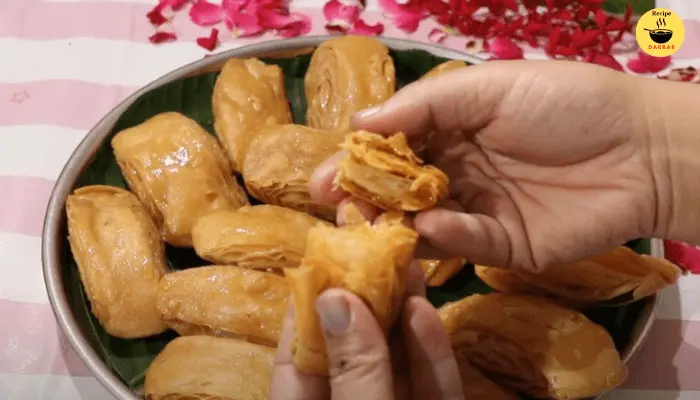
Khaja or Pheni is a layered, deep-fried pastry soaked in sugar syrup, offering a crispy exterior & a juicy interior. It’s not just a sweet, it’s an offering, a tradition, and a story passed down through generations. The multi-layered, flaky, crunchy, syrupy, and melt-in-mouth Sweetness offers a delightful treat. Khaja is a most sacred sweet in Indian cuisine.
As I mentioned earlier khaja or pheni recipe is also known as mini layered chiroti recipe. Khaja recipe is quite easy but needs skill with patience. Further, I would like to share step-by-step, effortless tricks & tips with proper guidance while preparing the Khaja recipe or the Pheni recipe. A detailed recipe that you can try at home.
What is Khaja / Pheni Recipe?
Khaja recipe is a little bit different from other normal indian sweets, but the taste is amazing. Khaja is also known as pheni,pheni gaja,pheni sweet,khaja gaja, or pheni pitha, which is mostly prepared during religious occasions like Ratha yatra, Bahuda yatra, Kartika purnima, Manabasa gurubar, Shankaranti, and also wedding occasions. Whether it’s for a festival or a wedding, Khaja or Pheni brings people together. Today, it’s found in sweet shops all over India.
India is a land of diverse cultures, and each region has its signature sweets that reflect its unique heritage and traditions. Indian Sweets or meethai are an important part of indian culture and festivals. They are the symbol of love, togetherness, gratitude & prosperity. All festivals, ceremonies, or occasions can not be celebrated without khaja or pheni sweets.
A Brief History Of Khaja Or Pheni Recipe
In Odisha, Puri is famous for the Lord Jagannath temple, where devotees famously offer as a bhog or prasad (holy offering ). This sweet delicacy is a significant part of the “Chappan Bhog” (56 offerings) served to Lord Jagannath in Puri. Khaja is believed to date back over 2000 years. Making it one of the oldest surviving Indian sweets. It’s an expression of spirituality, culture, and simplicity. In India, in some parts of Karnataka, Andhra, the name may differ, but the essence remains the same: a light, crispy, layered pastry and often served dry or soaked in sugar syrup.

Variations Across Regions
| Odisha’s Khaja / Pheni | Simply sugar syrup coating. Usually deep-fried in ghee or oil More crispy & less Sugary. Offered at the Puri Jagannath temple. More rustic and less sugary |
| Andhra Khaja (Kakinada Khaja) | Slightly more syrup-soaked. Soft Inside & crunchy outside. Famous in coastal Andhra. |
| Bihar Khaja | Less Sugary & More spiced Includes fennel Seeds & a touch of black pepper |
| Pheni (Maharashtra/Karnataka) | Made with both all-purpose Flour ( Maida ) or Semolina ( Rava ). Often eat during Ganesh Chaturthi or Nag Panchami. Thin & crispy layer, Like Lace. |
Ingredients Required (what You Need to make Khaja/Pheni )
Main Ingredients:
For the Dough:
- Plain flour (maida) – 2 cups
- Ghee or oil – 2 tbsp
- A pinch of salt
- Water -As required to knead the dough
For the Layering Paste (Sata or Saata):
- Melted Ghee – 2 tbsp
- Rice flour or Conflour – 1 tbsp
For Sugar Syrup:
- Sugar – 2 cups
- Water -2 cup
- Few Saffron Strands
- Cardmom Powder -¼ tsp
- Lemon juice – 1 tsp (Prevents Crystallization )
For Frying:
- Ghee or Oil ( For deep frying )
For Garnishing
- Chopped Almond
- Chopped Pistachios
- Silver wark
Kitchen Tools Needed
- Deep Frying Pan or Kadai
- Rolling Pin & board
- Slotted Spoon
- Mixing bowl
- Brush Or Spoon ( For Layering Paste )
How to Make Khaja Recipe – Step-by-Step Process:
Step 1: ( Prepare the dough )
- To make Dough, take a mixing bowl or a Parat. Add a cup of Maida/Plain flour, a pinch of salt.
- Then add melted Ghee 2 tbsp. Mix & combine Everything Well until it has a crumbly texture.
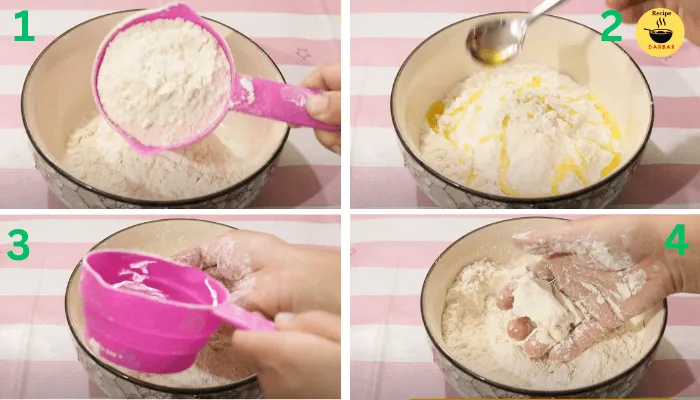
- Add little by little water and knead it into a semi-stiff but firm dough.
- It should be smooth and Pliable But not sticky.
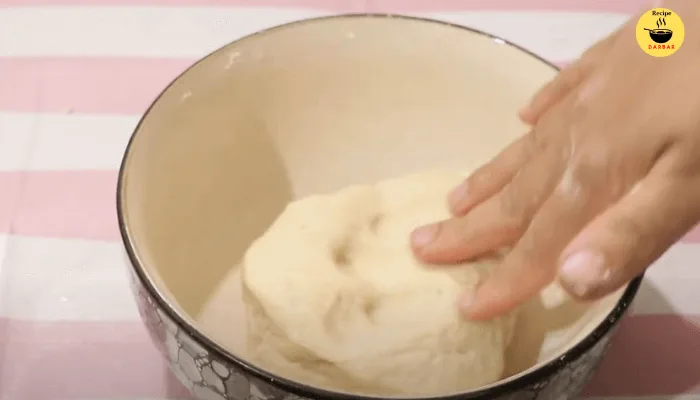
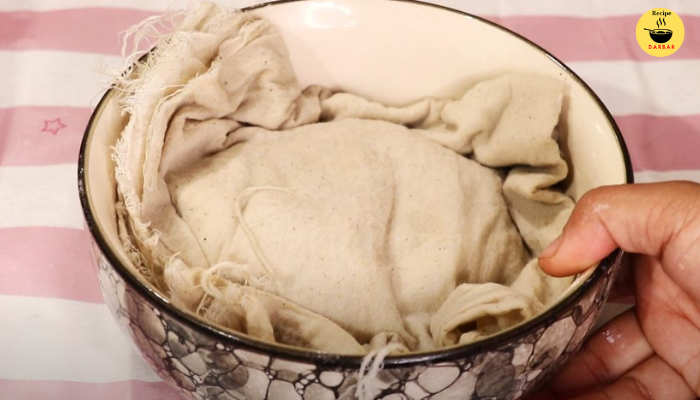
- Cover with a damp cloth & rest it for 20 minutes.
- Resting the dough helps in rolling it thinly.
Step 2: Prepare the Sugar Syrup
- Heat a saucepan. Add the same quantity of sugar & water.
- Heat until the sugar dissolves,
- Mix & bring to a boil.
- Add cardamom powder, saffron for flavor.
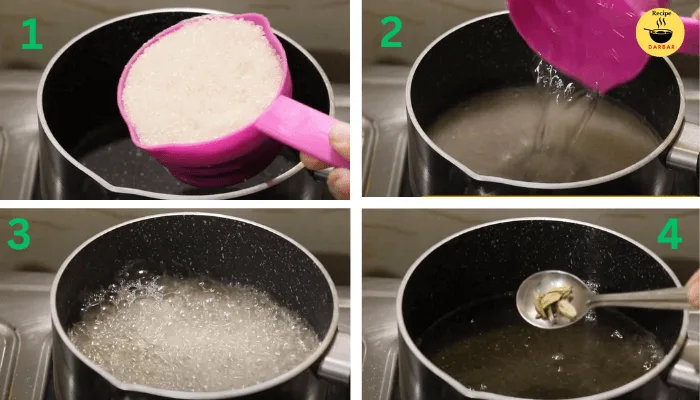
- Add 2 to 3 drops of lemon juice to prevent crystallization.
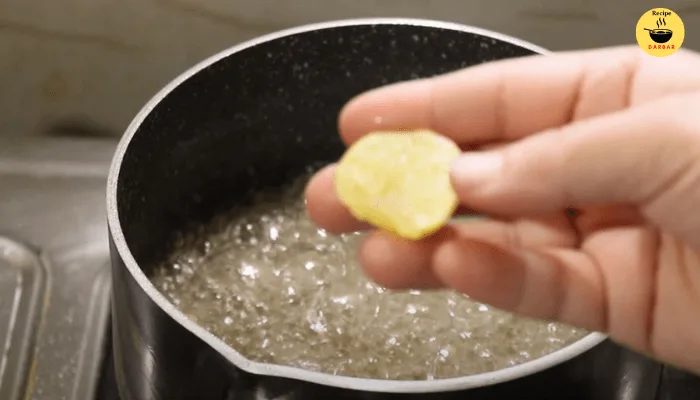
- Mix and boil until the syrup reaches a one-string consistency (i.e., when a drop of syrup between your fingers forms a string ).
- Switch off the flame & keep it warm on the side.
Step 3:Making the sata (Layering Paste )
- Take a small bowl, add rice flour or corn flour,
- Add melted ghee, 3 tbsp.
- Mix everything well & make a smooth and spreadable consistency. This paste helps to create the signature layers in Khaja or Pheni.
- Cover & keep aside

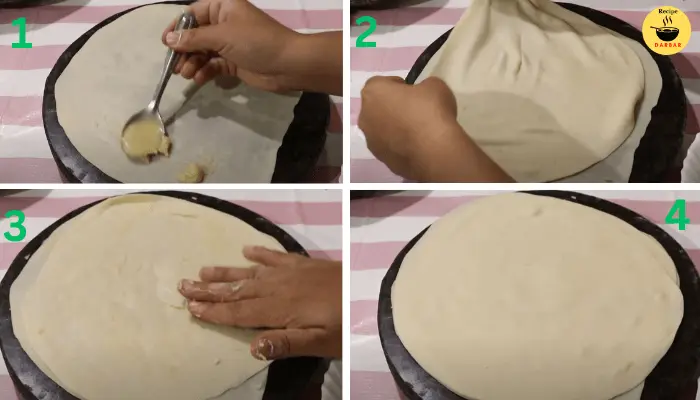
Step 4: Rolling & Layering The Khaja
- Take out the damp cloth. Divide the dough into 6 equal portions.
- Dust with flour, roll out each ball into a thin disc (like roti ) using a rolling pin.
- Similarly, repeat the process and make roti out of the dough.
- Take one rolled-out sheet, add sata (rice & ghee paste) 2 tsp and spread.
- Place the second sheet on top & spread the salt again.
- Repeat until stacked 3 layers. Don’t put the SATA on the top layer.
- Roll the stacked sheet tightly like a Swiss roll and apply water to the edges to seal.
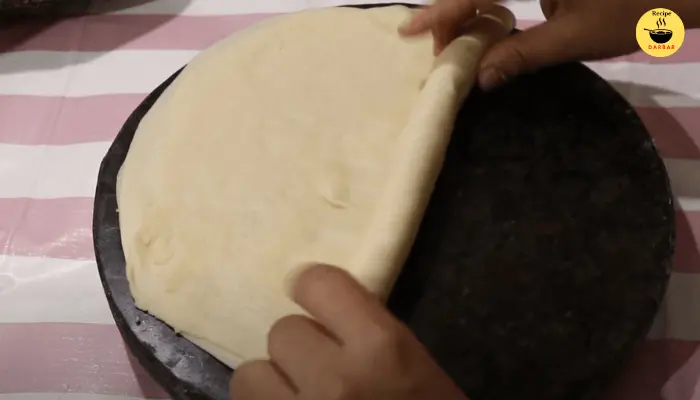
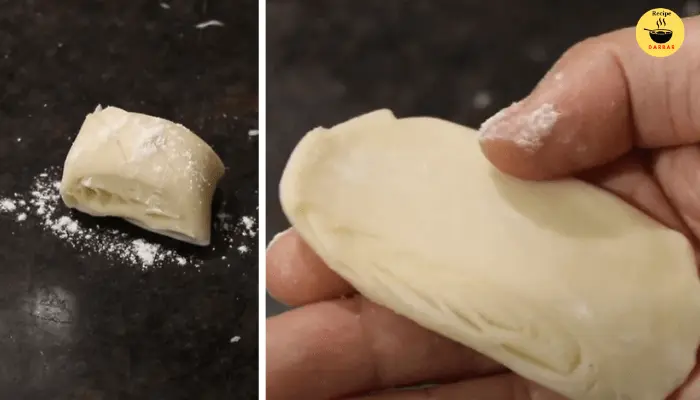
- Cut the log into 1-inch equal pieces,
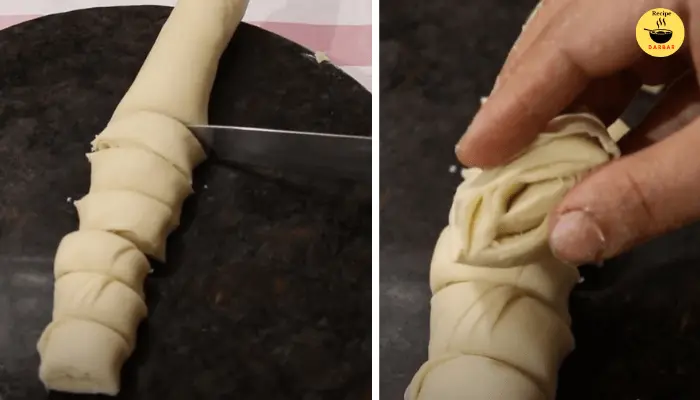
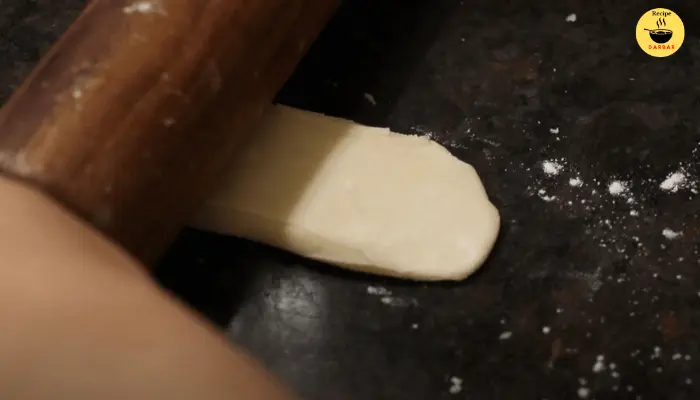
- Flatten each piece slightly using a rolling pin. Roll it out gently into an oval shape. The Khaja strip is ready.
- Repeat with the remaining 3 dough balls.
Why This Works: Rolling into a log and slicing ensures visible layers, giving Khaja its trademark flakiness.
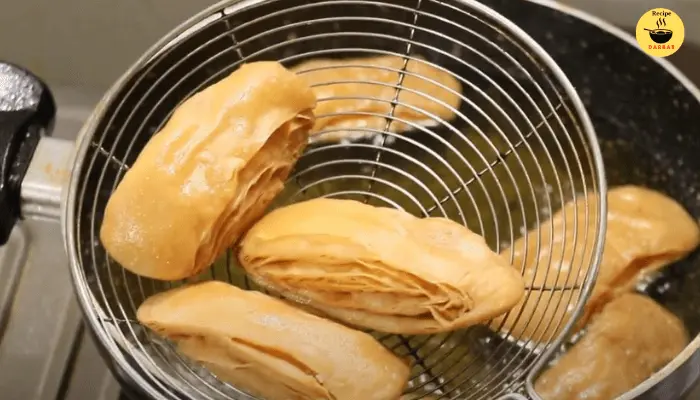
Step 5:Frying the Khaja or Pheni
- Turn on the gas. Place a kadai. Add ghee or oil & heat till lukewarm.
- Khaja or Pheni is not fried in too hot oil, otherwise the khaja will uncooked the layers inside & brown quickly.
- Carefully drop one piece at a time.
- Gently move them in the oil using a slotted spoon. Slowly, it turns golden, so it turns from time to time.
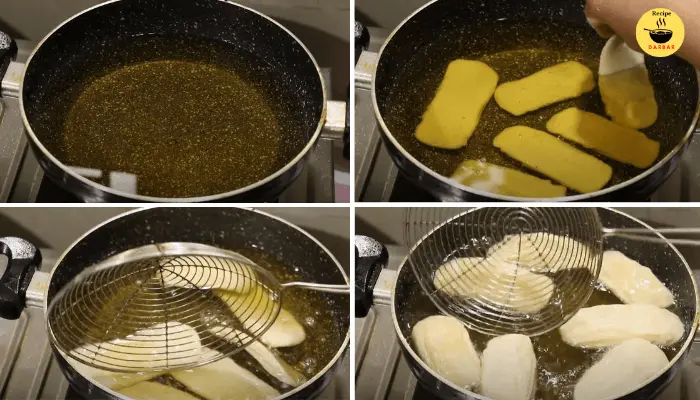
- It takes 10 to 15 minutes. Keep stirring and fry until golden and crispy on all sides.
- Looks golden & flaky. Drain on Paper towels. Similarly, fry the 2nd batch.
Step 6: Deeping & Soaking The Khaja (Pheni) In Syrup
- Whill Khajas are still warm, dip them in the warm sugar syrup for 1 minute.
- Ensure both sides are well-coated, and shake off the excess sugar syrup.
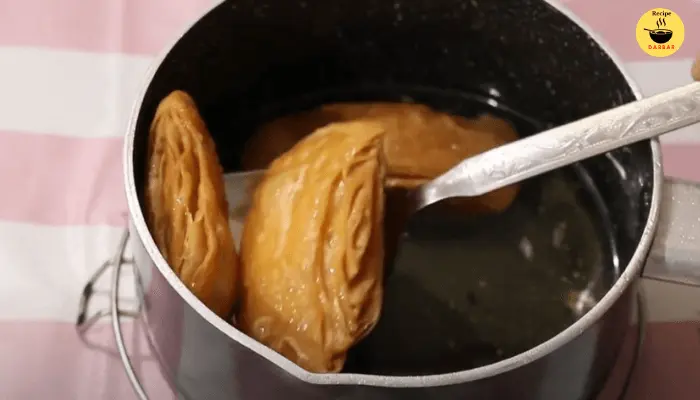
- Remove & place on a greased plate or wire rack to cool.
How to Serve And Store Khaja :
- Best enjoyed with masala tea, elaichi milk, or as it is a festival snack.
- Use a preheated oven for 2 -3 minutes at 120 °C to revive crispness. Don’t microwave.
- Khaja should be stored up to 7 – 10 days in an airtight container. remain fresh and crispy.
- Optional – Garnish with chopped pistachios, almonds, nutmeg, cloves, black pepper & decorate with silver or gold leaf to make it attractive.
Pro Tips For a Perfect Khaja Recipe
- Always maintain a medium flame. Don’t hurry when frying.
- Use chilled ghee for flakier layers.
- Don’t overcrowd the frying pan.
- Sugar syrup must be warm, not boiling, when dipping khaja or pheni.
- For visible flaky layers, consistent layering & rolling are key.
- Resting the dough improves texture.
- The texture of the dough must be slightly stiff, not too soft like roti or naan dough.
- Roll the dough into a disc of medium thickness, not too thick or too thin; you can check the video for thickness.
- Enhance the sugar syrup with natural flavours like saffron, rose water, cardamom, or cinnamon powder.
- for a deep, heavy-bottomed pan or kadhai to maintain a stable temperature for the perfect Khaja recipe.
🔥 Quick Safety Tips While Cooking
- Be careful with hot oil – Add Khaja slowly.
- Avoid Overcrowding – Frying in small batches.
- Keep the stove attended – Never leave your dish unattended on a high flame.
- Use the Right Equipment – Avoid nonstick cookware, use a heavy-bottomed pan.
- Control Oil Temperature – Maintain optimal range & avoid overheating.
- For a visual guide on preparing Khaja, you might find this video helpful 💬 Tried This Recipe?
Let us know how it turned out in the comments below!
Share your version on Instagram and tag us with #KhajaRecipe.
Q: Why did Khaja turn soft?
Frequently Asked Questions :
- Either the dough was too soft, or the syrup was too thick & cooled before soaking. If the oil is too hot, then the khaja turns soft.
Q: Should Khaja be baked instead of frying?
- Yes, you can bake it at 180 c for 20 -25 minutes with brushing ghee or oil midway. The texture may differ, but it’s a healthier option. Traditional Khaja is fried for that signature crispness.
Q: How should I store leftover Khaja or pheni?
- Store dry pheni in an airtight container at room temperature.
Q: Can I add other ingredients to enhance the flavor?
- Absolutely, you can add other ingredients like cardamom, saffron, pistachios, and cashews to elevate the flavor & richness.
Q: Can I make gluten-free Khaja?
- You can try using gluten-free flour, but the traditional flaky texture may not be the same.
You might enjoy this recipe too. If you loved that, try this from our favorites:
👉 Follow us for more Indian recipes that excite your palate!
Conclusion & Suggestion :
Khaja is a delightful dessert that combines simplicity with a rich cultural heritage. If you want to explore regional indian desserts, this Khaja offers you a perfect opportunity to create something beautiful & deliciously sweet. Making Khaja is often a family ritual. The intricate layering of Khaja & careful frying represent patience, technique, and tradition. One bite will tell you it’s worth every minute.
So the next time you want to create something special and unique, take a trip down memory lane with this crispy, golden, Delightful Khaja.